
Understanding and Modifying the Hermes Bytecode


.svg)
The React Native Pentesting for Android Masterclass has taught us how to edit and patch React Native apps in the previous blog. Let’s now move on to the Hermes bytecode.
The React Native team created their own JavaScript engine, Hermes, which runs React Native applications. The JS source code is often compiled into the Hermes bytecode.
Hermes is an open-source JavaScript engine optimized for React Native. For many apps, enabling Hermes will result in improved start-up time, decreased memory usage, and smaller app size. Refer: https://reactnative.dev/docs/hermes
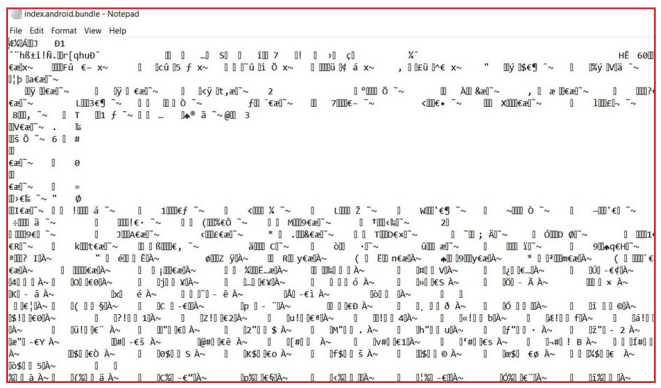
Thus, when you decompile the React Native application that used Hermes during compilation, the code in the “index.android.bundle” file will be converted into Hermes code. The contents of the file will look like this:
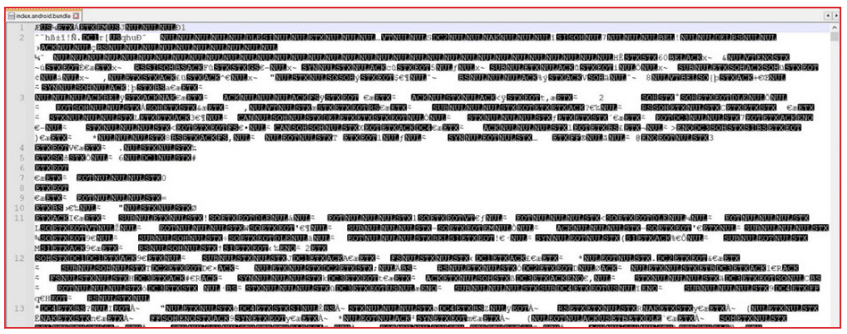
Shoutout to bongtrop for creating hbctool. This tool lets us disassemble and reassemble the bundle file to return it to the Hermes instruction bytecode. We will learn how to assemble and disassemble the .bundle file later, but first, we need to make some sense of the messy Hermes bytecode.
Understanding Hermes bytecode
Currently, there is no way to convert disassembled Hermes bytecode to readable JavaScript code. We have to understand bytecode in bits and pieces to modify the behaviour of a specific function and, eventually, the application. Bytecode consists of a bunch of constants and functions that make up the logic of the application.

Let’s look at some key elements in the Hermes bytecode and try to make some sense:
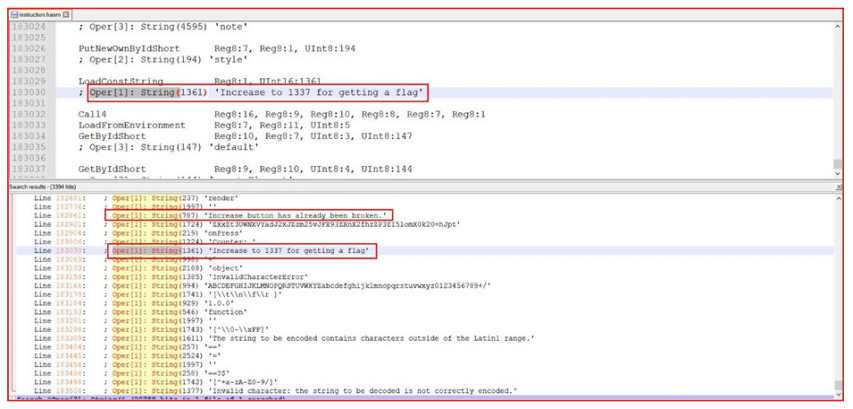
Oper[1]: String(strNumber)
This constant contains all strings either added by the user during development or strings of various JS libraries. But most of the time, this constant contains strings that we should look for. Examples of the strings are below:
Tip: Always search from the bottom of the “instructions.hasm” file to find strings that are added by the developer during development.
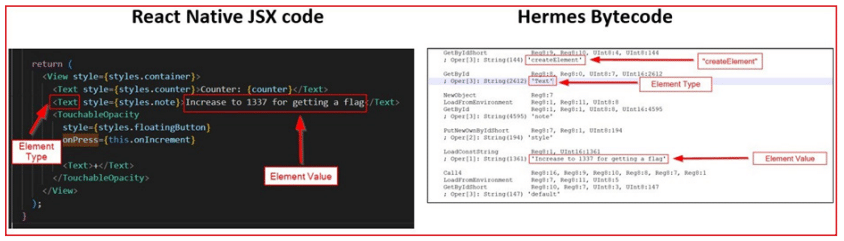
createElement:
“createElement” string value refers to the JSX element which is created in React Native. Refer to the below side-by-side comparison of the JSX code vs Hermes bytecode:
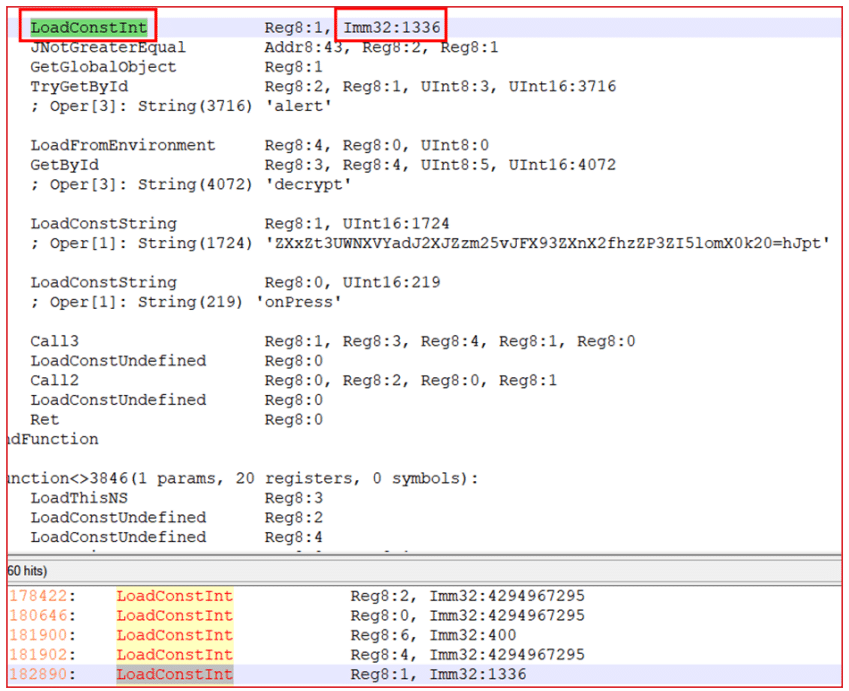
LoadConstInt:
This element stores all integer values created within the application.
Relational Operators Identification:
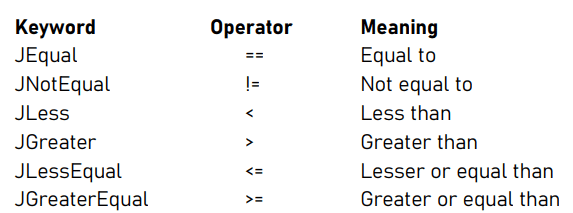
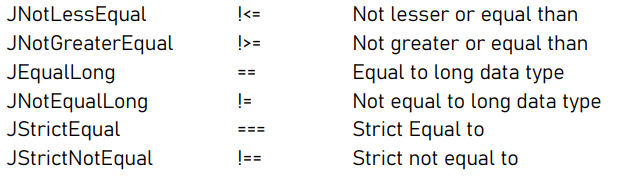
The instruction code has different keywords for relational operators. Below are some of the important keywords and their meanings.
Find a function name with a string:
We can search for any specific function with the help of a string.
For example, look at the application’s screenshot below:
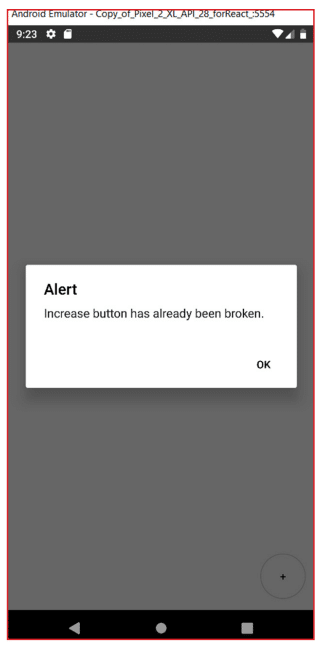
We can search with any keyword in the string shown in the screenshot below:
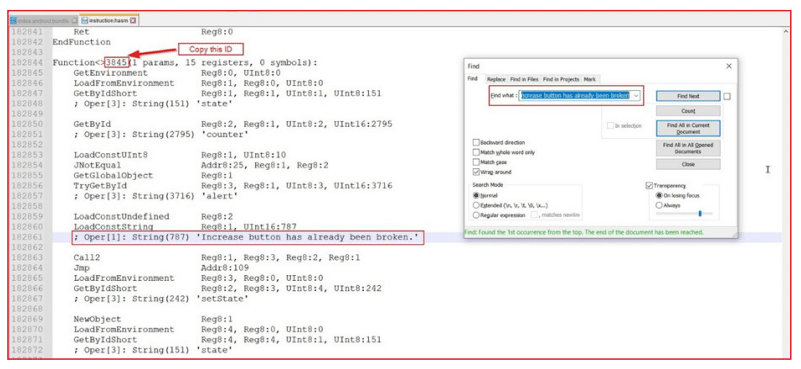
Copy the ID of the function as shown above and search for this ID in the file.
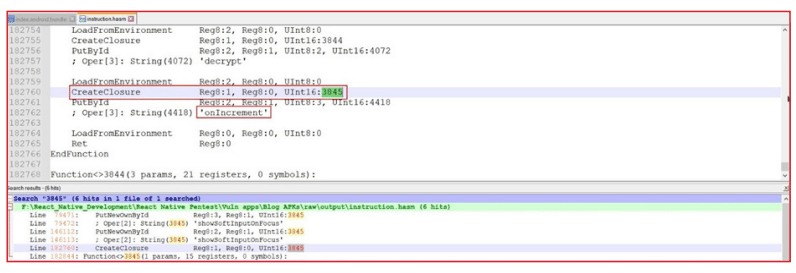
You will get the name of the function. For reference, here is a comparison of React Native JSX code and Hermes bytecode.
The Comparison:
React Native JSX code of “onIncrement” function: Hermes Bytecode of the “onIncrement” function:
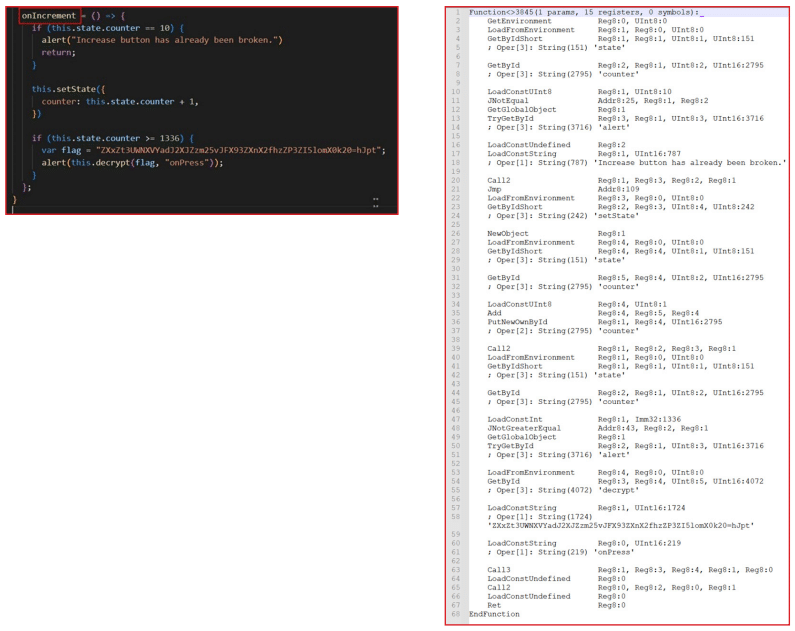
This way, we can link any function with its properties.
If you want to learn more about Hermes bytecode, there is a great playground for it:
Now, let’s disassemble/assemble the obfuscated code into bytecode.
Steps:
Note: We will be solving a challenge created by “bongtrop”. More info here: “suam.wtf”
- Install the vulnerable application, and you will get the following screen:
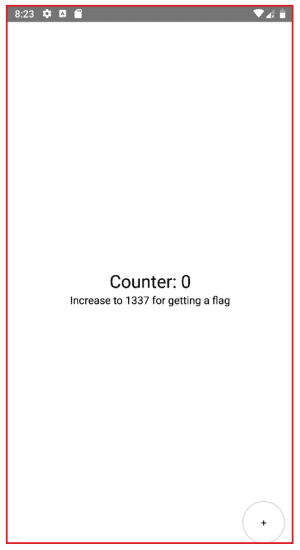
- We have to increase the counter value to 1337 to get the flag. But if we did try to increase the counter value with the “+” button at the bottom, we get the following error:
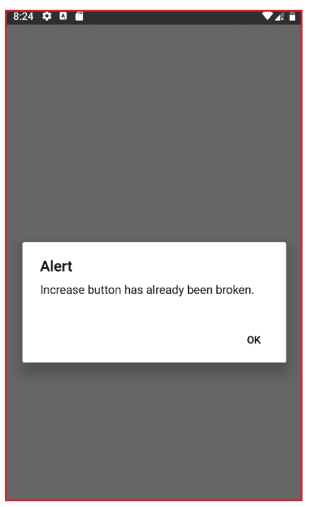
- This means we have to set the counter value as 1337 directly.
- Change the extension of .apk file to .zip and open this file with WinZip.
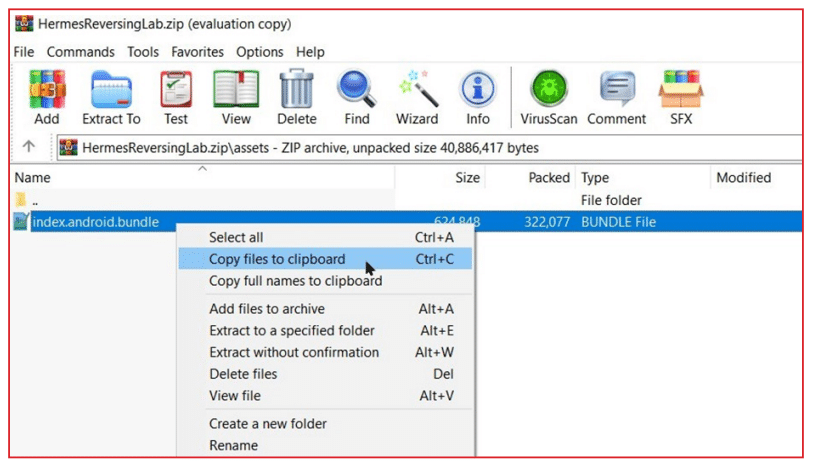
5. Go to the “/assets/” folder and copy the “index.android.bundle” file in any folder on the system.
6. If you open this file, you will find a gibberish code.
- Let’s convert this mess into a bytecode. Install hbctool with the following command:
pip install hbctool
8. Open the command prompt in the folder where the “index.android.bundle” file is pasted and run the following command to disassemble the file:

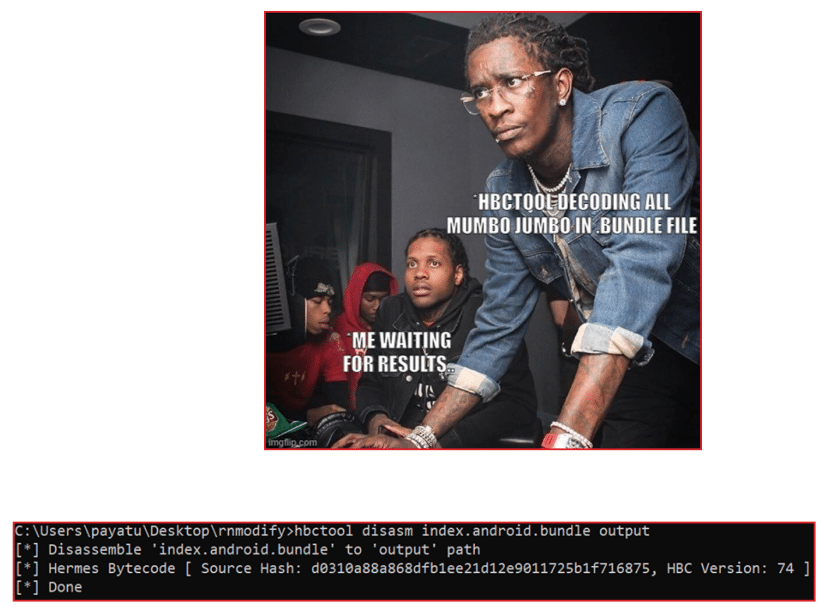
9. Go to the “output” folder create, and there you will find the “instructions.hasm” file. You will find all of the React Native application’s JS code in bytecode format.
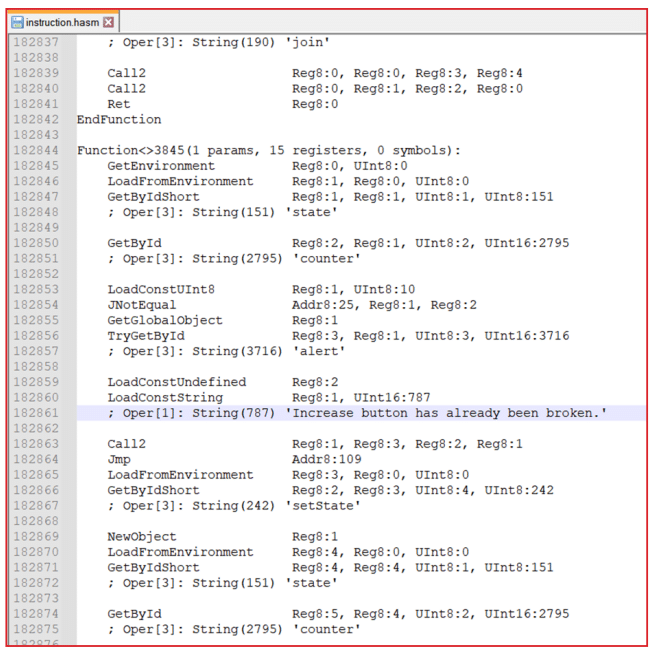
10. As we have to increase the counter value to 1337, first find the function that deals with the counter value. We can search with keywords of the error “Increase button has already been broken.”
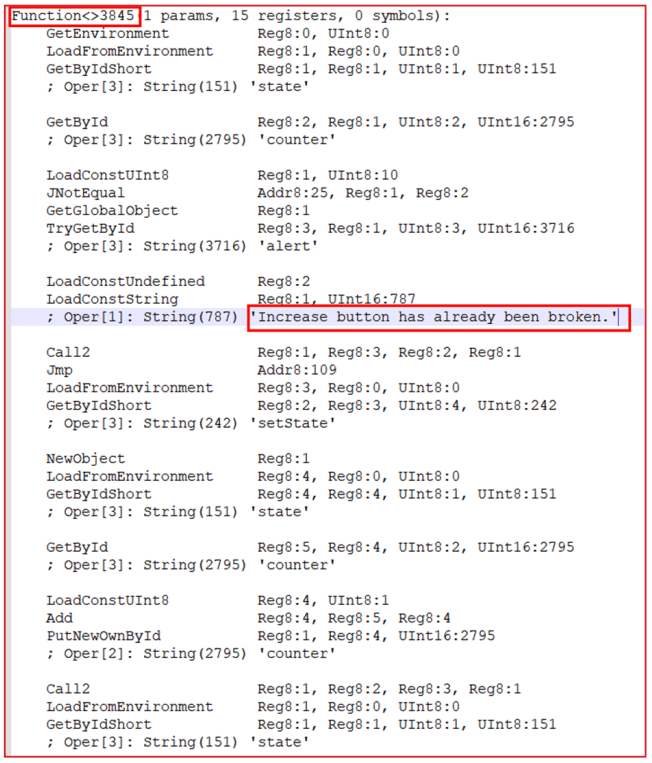
11. As we observed above, the counter breaks when we try to increase the counter value beyond 10. Thus, the application performs a “Relational operation” to verify whether the counter value exceeds 10.
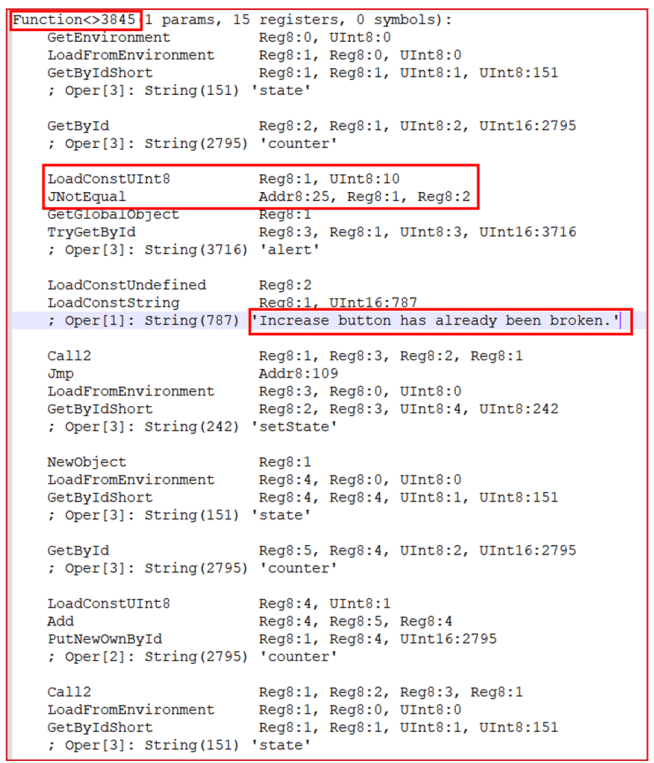
12. Instead of increasing the counter’s value, we can change the target value, i.e. 1337, to 4. For this, we have to find the relational operator in the same function, which checks whether the counter value is greater than 1336 or equal to 1337.
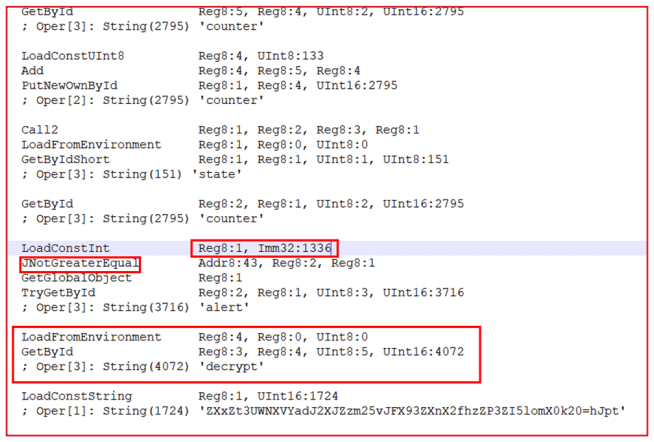
13. We have found a relational operation that says decrypt and alert the flag if the counter value reaches 1336 or greater. (Note that the flag is encrypted in this case.) Thus, we can change this value from 1336 to 10 or less. We are changing it to 4 here.
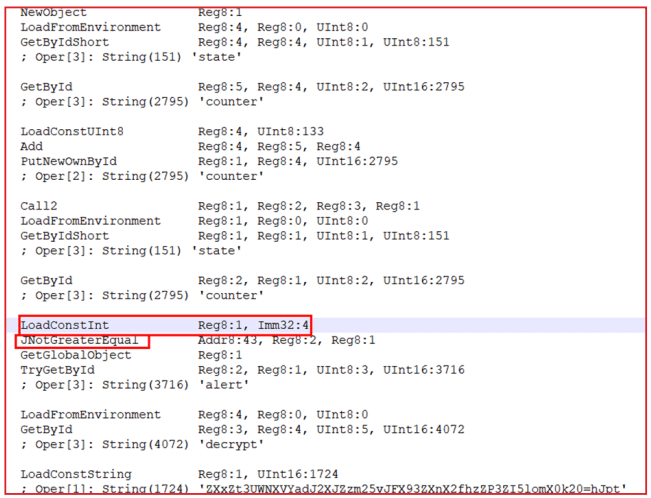
This means, if the counter value reaches greater than 4 then we will get the flag.
14. Save this file after making any changes and open the “.zip” file of the APK.
15. Now, we need to assemble the index file back to Hermes bytecode format.
16. Open a command prompt and run the following command:
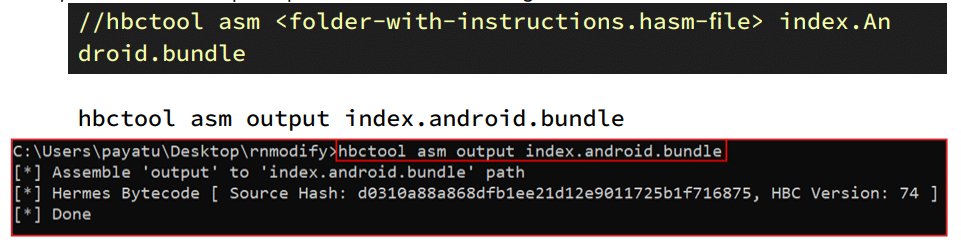
17. Go to the “/assets” folder. Delete the original “index.android.bundle” file and paste this newly created file there.
18. As usual, we also need to remove the signature files. Go to the “/META-INF” folder and remove the following files:
- CERT.RSA
- CERT.SF
- MANIFEST.MF
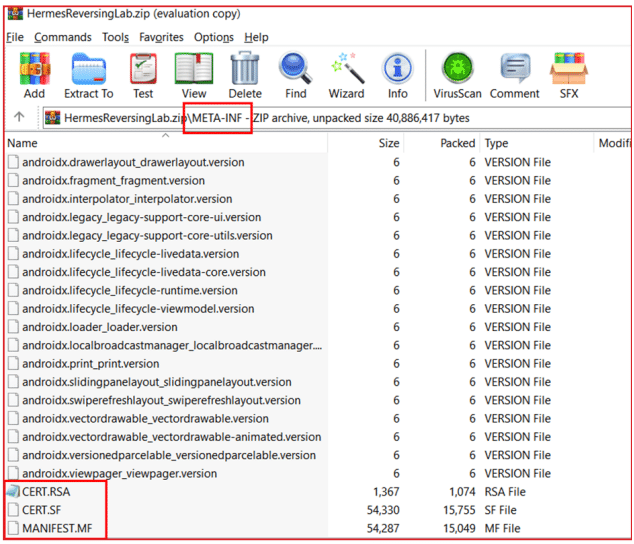
19. Exit the “Winzip” app and rename the file extension back to “.apk”
20. Now, we need to sign the modified APK with the certificate. To generate a custom certificate, run the following command and fill out the details:
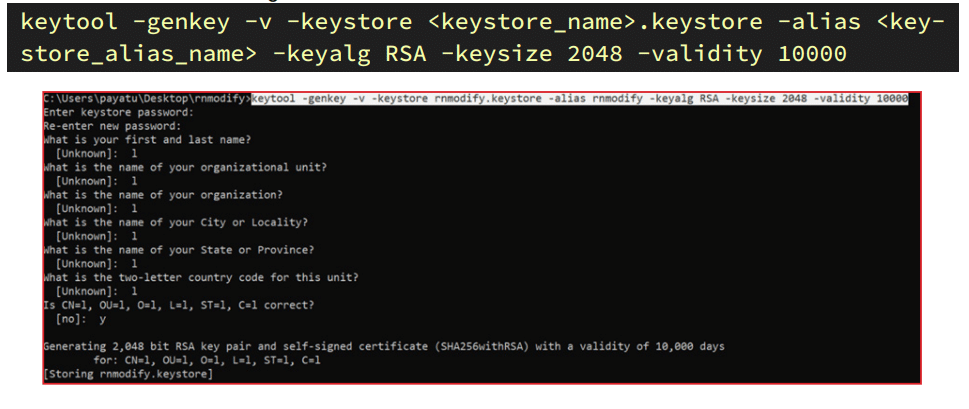
21. We will sign our AOK with the generated keystore. Run the following command and enter the keystore password set while creating the keystore in step 6.
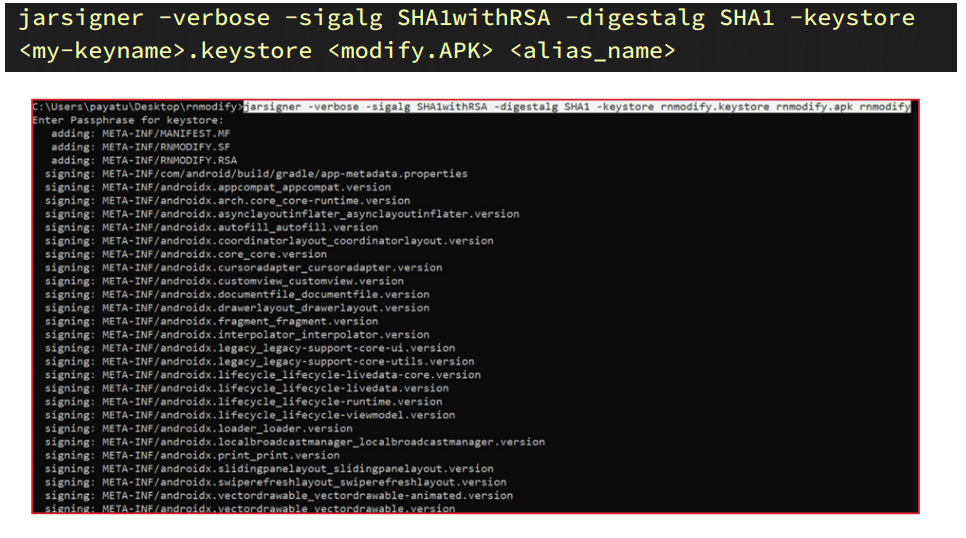
22. Install the modified APK with adb, and the modified APK file will successfully get installed.
adb install <modified.apk>
23. Increase the counter value by tapping “+” button 5 times and you will get the flag.
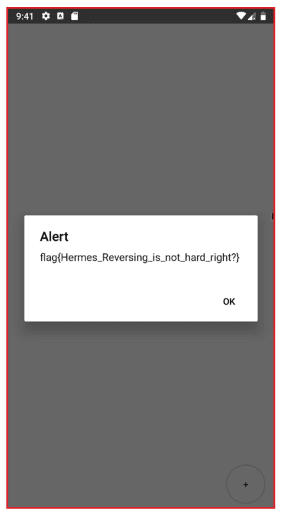
Understanding and analyzing Hermes bytecode can be a headache. However, certain patterns in the bytecode help us understand the flow of the functions, methods, and constants.
Root detection bypass
In React Native applications, the JailMonkey npm package is widely used to detect rooted android devices. It is also used to detect mocked locations, hooking statuses, and some basic device integrity checks.
What is JailMonkey?
As mentioned above, JailMonkey is a third-party npm package that provides functionality to check or detect whether the device is rooted. It utilizes the API “isJailBroken” to check the root status of the device by checking various pieces of information throughout the device, such as whether the “su” binary exists in the device, whether the “busy box” is installed, checking alternate paths for “su” binaries, etc.
We can bypass this check by modifying the “isJailBroken” function in the “index.android.bundle” file. Below is how to do it.
Note: Always try to modify the function instead of removing it altogether, as there might have been some references in the rest of the code.
Steps:
1. Open the vulnerable application, and you will see that it is detecting the device’s root status.
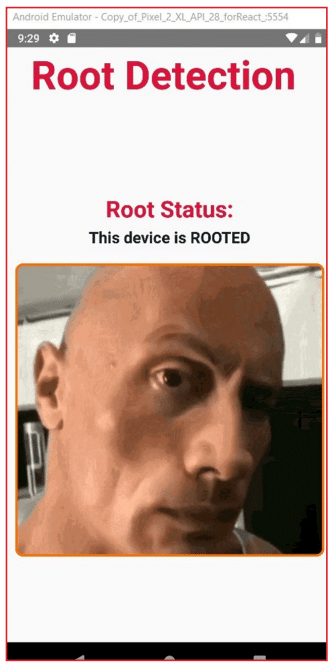
2. Now change the extension of the APK file from “.apk” to “.zip” and open it with any file compression tool, such as 7z or WinZip.
3. Open the “/assets/index.android.bundle” file and search for the isJailBroken keyword. You can search the below keyword to reach the correct code line:
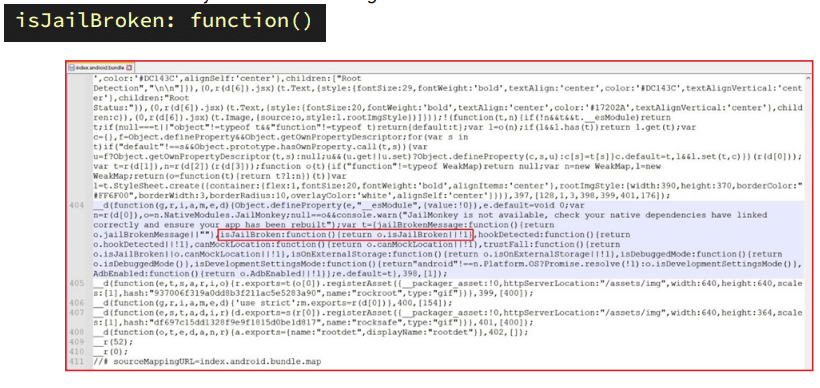
4. Modify the function as shown below:
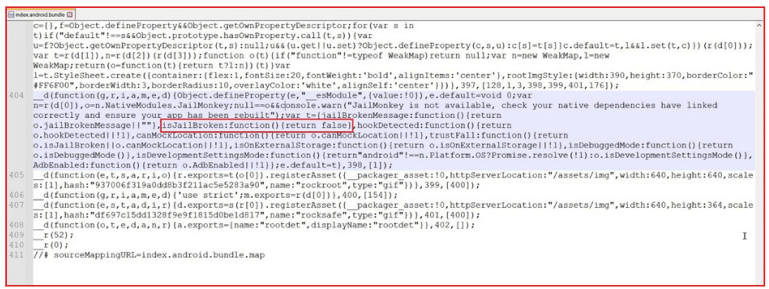
We modify the function to return a “false” boolean value to the “isJailBroken” function.
5. Go to the “META-INF” folder and delete the following files
- CERT.RSA
- CERT.SF
- MANIFEST.SF
6. Change the file extension back to “.apk” and run the following command to generate the keystore file,
keytool -genkey -v -keystore <keyStoreName>.keystore -alias <keyStoreAlias> -keyalg RSA -keysize 2048 -validity 10000
7. Now, sign the APK with the newly generated keystore. Run the following command:
jarsigner -verbose -sigalg SHA1withRSA -digestalg SHA1 -keystore
<my-keyname>.keystore
<VulnerableApp.apk> <alias_name>
8. Install the application into the device with
adb install VulnerableApp.apk
9. Open the application, and you will see root detection has been bypassed.
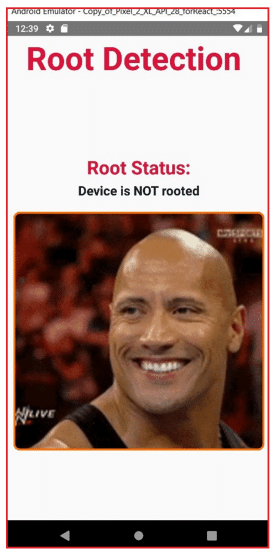
The example shown above is not limited to the test case shown. The implementation of the “isJailBroken” function may vary. Understanding the function implementation is important when modifying it as per our requirements.
Bonus:
Below is the actual project code snippet vs webpack compiled code for reference.
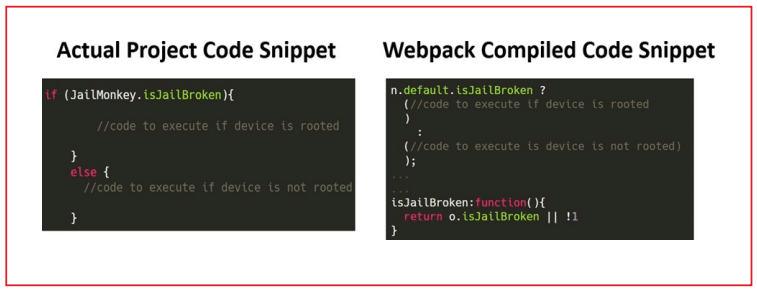
You are now fluent in understanding Hermes bytecode, some key elements in it, root detection bypass, and what JailMonkey is. You will learn about SSL certificate pinning bypass to pentest react native applications successfully in the next blog
Keep practising!


Talk to a security researcher
This is the default text value


