
Bypassing SSL Certificate Pinning


.svg)
In the last blog of the React Native Pentesting for Android Masterclass, we covered understanding the Hermes bytecode. Let’s move forward!
What is SSL certificate pinning?
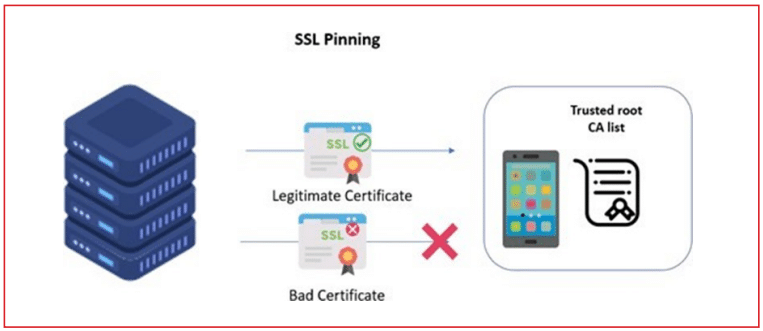
You might already be aware of SSL certificate pinning in the Android application. In short, SSL certificate pinning is a process of associating a host with its expected X509 certificate or public key.
In certificate pinning, the application is configured to accept only the certificate of a specific domain instead of any trusted CA root certificate in the device (such as the PortSwigger CA certificate)
Bypassing certificate pinning with Frida
Frida by codeshare is the go-to tool for bypassing the certificate pinning in runtime. The famous “Universal Android SSL Pinning bypass script” also works great with React Native applications.
You can refer to the article below to perform a pinning bypass like a normal Android application: “Hail Frida!! The Universal SSL pinning bypass for Android applications“
But..
What if, due to any circumstances, we cannot dynamically hook the application and bypass certificate pinning, or do we want to bypass the certificate pinning permanently?
Manually Patching React Native application to bypass certificate pinning.
The most used technique to implement certificate pinning in React Native applications is by utilizing the “react-native-ssl-pinning” node module. The major disadvantage (perhaps an advantage for us
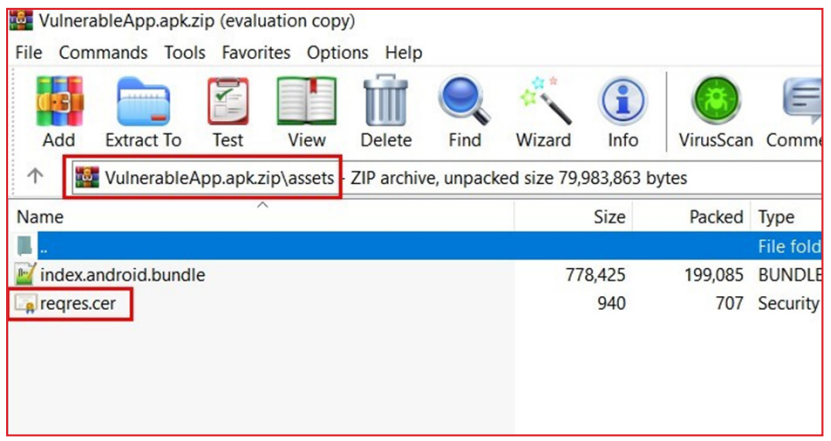
) of certificate pinning in React Native applications is the pinned certificate can be found in the “/assets” folder of the application. Hence, the attacker’s control over this certificate completely demolishes the certificate pinning implementation.
Steps:
- Change the extension of the .apk file to .zip and open the zip file using any compression tool such as WinRAR or 7zip.
- Go to the “/assets” folder and note the name of .cer certificates.
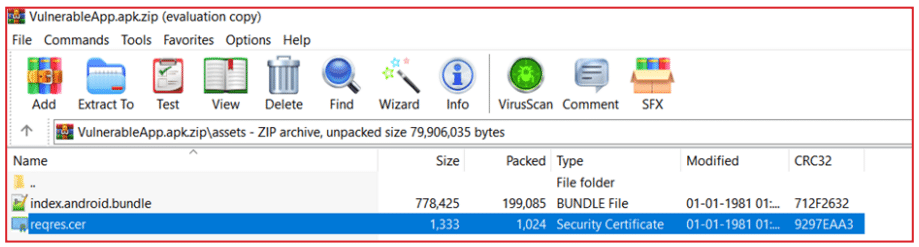
3. Delete all “.cer” certificates from the “/assets” folder.
4. Now configure BurpSuite with an Android device and generate a .der certificate from BurpSuite.
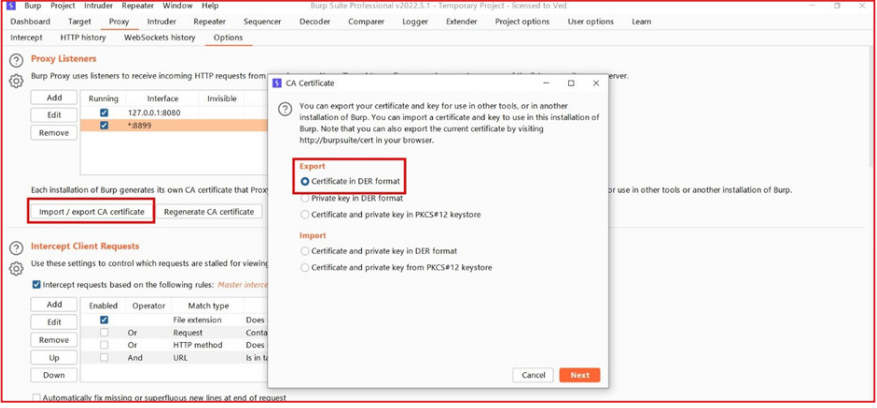
5. Change the certificate extension from “.cer” to “.der” and Rename the newly generated “.cer” certificate from BurpSuite with the name copied in step 2.
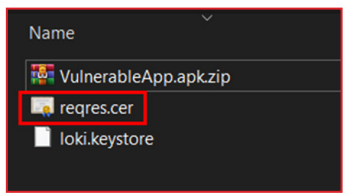
6. Paste these new certificates in the “/assets” folder.
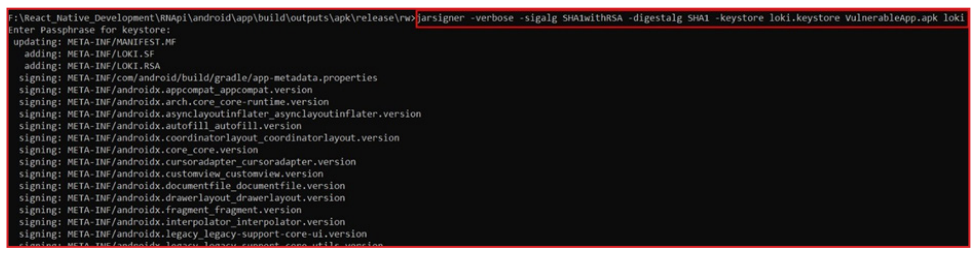
7. Delete files in META-INF and sign APK as instructed earlier.
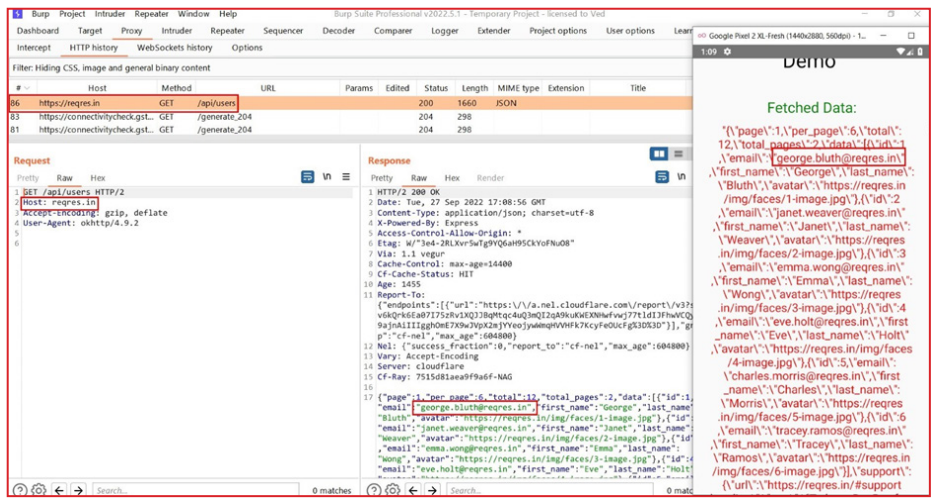
8. Install the application and intercept the encrypted HTTP traffic.
It is now time to learn how to identify manually installed npm packages and the different types of npm packages in React Native applications. We will learn this in our next blog.
Till then, keep pentesting!


Talk to a security researcher
This is the default text value


